Decking the Yurt's Roof
Angles upon angles
May 24:
adding deck supports between the rafters
 |
| |
Before we can start cutting the roof decking, we need to add some support in between the rafters, and like most aspects of working in the round, that's easier said than done. Each support has to be cut at three angles; each edge at 10 degrees, and the top needs to be relieved at 21 degrees.
the first half of the deck supports in place
 |
| |
This also marks the point where we'll be starting to use wood milled here at Windward. We don't cut down live trees to mill lumber, but like all living things, some trees die every year, and we endeavor to get them to our sawmill in time to preserve their utility for non-structural purposes. We use commericially inspected lumber for anything that has to undergo stress, but as the constuction proceeds from here, we'll have lots of opportunity to use our own wood -- a process which not only saves money, but which also weaves a bit of Windward back into whatever we create.
May 26:
the last of the decking supports in place
 |
| |
More rainy days, so we're tending to other stuff such as triming the tile we set in the kitchen, and getting started on Vermadise's 8'x10' entrace room, a space for storage and seed starting.
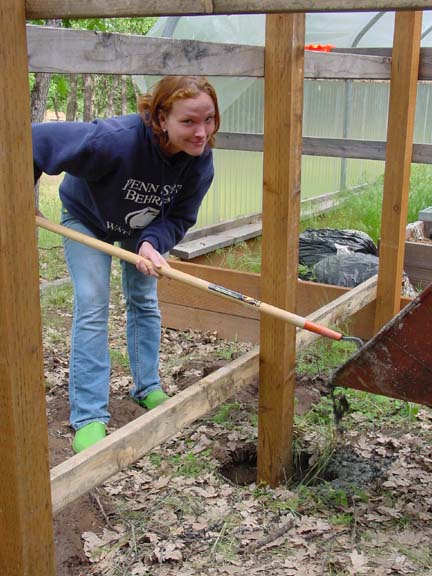
Jacki adds cement to the footing for Vemadise's northern entry room.
 |
| |
May 28:
the main body of the roof deck in place
 |
| |
One way that decking the roof was challenging involved figuring out a way to do it without wasting an awful lot of plywood. The path we chose involved cutting four foot tall trapazoids, a tactic which allowed us to cut five roof sections out of each sheet of 1/2" plywood. Each section had to be custom fit, so that took some time, but with Sarah and Jacki's able assistance, the work went forward smoothly.
This is a bit of progress that I find particularly pleasing in that we now have a covered space where we can leave tools at the worksite instead of having to haul them back and forth from the workshop each day -- it never seems to fail that you quickly find that you've left some necessary tool behind and have to make another trip or two.
May 29:
the upper portion of the roof decking installed
 |
| |
The task for the day was to fit and install 19 plywood trapazoids to continue the deck on up to the ring. Once the plywood pieces were installed, we used a saws-all with a long wood blade to trim the plywood flush with the ring.
June 3:
Lots of other stuff going on for the past few days getting the propagation greenhouse's foundation dug, adding retaining walls to Vermadise's entrance, filling more raised earth containers in the garden, and so on. And we've been blessed by a good deal of spring rain, which is good for the garden, but not the sort of thing that inspires one to work outside with power tools.
the gutter edge intalled connecting the ends of the rafters
 |
| |
Yesterday we had a nice weather window and got to work fabricating an edge for the ends of the rafters. This will be provide a solid place to secure the sheet metal which will eventually cover the roof, as well as allow us to mount gutters to catch water coming off of the roof so that we can divert divert it away from the yurt, and in time, into storage for use in the garden.
June 4:
Not much time to put in on the yurt today, but we were able to add another run of trapazoids around the lower edge of the roof thereby extending the decking down to the point where the rafters start to curve.
adding the last of the decking
 |
| |
Yesterday we had a nice weather window and got to work fabricating an edge for the ends of the rafters. This will be provide a solid place to secure the sheet metal which will eventually cover the roof, as well as allow us to mount gutters to catch water coming off of the roof so that we can divert divert it away from the yurt, and in time, into storage for use in the garden.
June 6:
Now comes one of the tricky parts -- creating the curved portion of the roof deck. At first we experimented with trying to bend eighth inch thick plywood, but the radius was too tight and the plywood was tending to break.
using lath strips to create the curve portion of the roof deck
 |
| |
The next option was to cut half-inch plywood into strips one and a half inch wide, and use that to lath the curved portion of the roof. It's slow going cutting five lath strips per facet of the roof, but this yurt is a labor of love, so what the heck.
I'm afraid that the pic doesn't do justice to the effect; the curved edge of the roof is helping to create the "organic" look that we've been working for -- the yurt is starting to look more like it grew there than that it was built there.
June 9:
The yurts been having to wait as work heats up on other projects such as fencing, composting, gardening and Vermadise, but even then there's things that we can do to move it forward such as using concrete left over from pouring the retaining wall to finish leveling the floor in the yurt. We won't go forward with installing the floor until the roof is finished and the interior is dry, but it helps to have a good, solid base in place and ready to go.
Jillian using some left over concrete to fill in gaps in the yurt's floor
 |
| |
Notes From Windward - Index - Vol. 66
|