Roofing the Yurt
Creating a curved roof over an open space
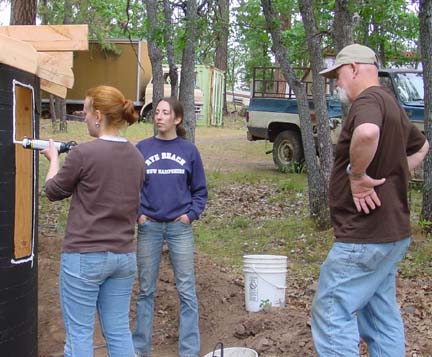
May 7:
the yurt's round skylight
 |
| |
The yurt is designed to have a round skylight in the center of the roof. The skylight will mount on the glue-lammed ring that forms the center of the yurt's roof, so the ring has to be sized to fit the skylight.
Once the dimensions were worked out, the initial ring was cut using the radius attachment we used to cut the curved door header.
cutting the outer edge of the ring
 |
| |
A quick reset of the radius jig, and a second cut creates the inner edge of the ring.
the first layer of the yurt's center ring
 |
| |
Once the initial ring is made, it's just a matter of glue-laming layer after layer of more 3/4" plywood until we get the thickness needed, but that's a task we'll undertake tomorrow.
May 8:
building up more layers of 3/4 ply
 |
| |
We've got a lot of scrap 3/4" plywood left over from making the curved headers, and we're using it up by cutting sections to glue and nail together to make the ring ever thicker. By the end of the day, it was five layers thick, but we'll need to add another three layers to achieve our target of a total thickness of six inches. I'm heading into town tomorrow, and will pick up another sheet of 3/4 ply since I want to cap the pieced-together layers with two layers that are cut out in one continuous piece.
May 10:
Sarah routes out more circles for the ring
 |
| |
Picked up another sheet of 3/4 ply in town yesterday, so it's time to cut the three remaining circles needed to finish the ring. Sarah lent a hand, and in no time at all the ring was eight layers thick for a total of six inches top to bottom.
May 11:
Sarah secures a piece of bracing
 |
| |
With the ring glue-lammed to the required thickness, the next step is to mount it in its final position so that we could start the process of cutting and fitting the roof joists. Two vertical 2x4s were used to hold the ring at the required heighth, and two 2x6s laid across the headers were used to secure the vertical 2x4s.
the ring secured in place and level
 |
| |
It took a bit of adjusting to get the ring level and equidistant from the headers, but that's just one of the reasons that construction screws are so handy -- if it isn't right, you just back the screw out and move it a bit.
test fitting the first joist
 |
| |
May 12:
Sarah grabs another trowel load of thinset
 |
| |
As usual, we have a number of projects going, and today's focus was on getting a start on tiling "bay four" in the kitchen.
We laid 27 one foot square tiles before running out of thin-set motar, at which point we cleaned the tools, and started back in on cutting more yurt rafters. We're using a combination of power, band and hand saws to cut the notches so that they'll have a solid, mechanical fit that should secure the rafters without having to rely on hardware to hold them in place -- oh sure, we'll bolt them down anyway, but the goal is to design the rafters so that the hardware is insurance rather than a necessity.
a stack of rafters ready to take up to the yurt
 |
| |
The yurt's circumference is thirty-six feet, so working on two foot centers, that would imply the need for eighteen rafters, except that we're going to do a sort of round dormer over the door. More on that later.
"The Plan" is to put up half the rafters on four foot centers, and then step back and decide whether we want to go with full runs for all eighteen rafters, or if it will make sense to cross brace when the rafters narrow down to a two foot gap. There's a trade-off between building in strength and avoiding excess weight -- so we're keeping our options open at this point.
May 13:
Sarah braces the paneling while Emily screws it in place
 |
| |
Well, after putting a number of rafters in place and stepping back for a look at the effect, the consensus is to go with a full set of eighteen rafters.
With that decided, we undertook to start the process of wrapping the framing with paneling since it's going to be far easier to bend it in place before we set the rafters than after. With a bit of team work, the first two sheets went into place easy enough.
May 14:
Sarah and Emily head through the woods to the river
 |
| |
This morning was so lovely that we decided to head down to the river for a bike ride up the abandoned, but well paved, logging road that winds along the wild portion of the Klickitat River. We went seven miles up river before we decided to head back in order to make sure that we weren't late for lunch (being on time for the main community meal is one of the few things we stress).
Sarah and Emily relaxing beside the Klickitat
 |
| |
After lunch it was time to get back to the task of cutting and fitting more rafters. The goal is to have a solid, mechanical fit, so each rafter is trimmed to fit down to the eighth inch. Even with a few rafters yet to install, the center ring is becomming very solid -- the final rafters have to fit exactly since the ring isn't moving at all.
Almost all of the rafters cut to fit and in place
 |
| |
May 15:
the yurt with the rest of the siding on
 |
| |
The next step was to apply the rest of the siding to the bottom third of the yurt.
the dormer over the door
 |
| |
Since the sides of the yurt are only six feet tall, it was important that the entrance way not be be restricted by the roof's overhang, so we installed a modest dormer on the part of the roof that leads to the door. That way rain will be diverted to either side without any loss of clearance.
May 16:
Sarah and Todd wrapping the yurt with 30# felt
 |
| |
In order to keep out drafts and moisture, the outside of the yurt was wrapped in 30# roofing felt.
May 20:
Sarah and Jacki enjoying the cattle drive
 |
| |
You know you're in deep country when it's a regular sight to see a cattle drive coming up the road :-) You can hear them coming from quite a ways away, and it's hard to resist stopping what you're doing to watch the cow dogs do what they were born to do.
Unfortunately, one of the cows brushed again our tree-mounted mailbox completely removing it, so work on the yurt had to wait as we went about the task of rebuilding it -- unfortunately, 3/8"lag bolts are no match for a thousand pound cow who's determined to go wherever she wants regardless of what in her way.
Sarah using a metal cut-off blade to cut some grating into 33" sections
 |
| |
Then we spent time cutting up a hundred feet of galvanized grating into 33" sections. These will be used in Vermadise to cover over the earthworm beds and support containerized plants such as tomatos and brocholi. The containers and plants will provide shade for the earthworms, and water dripping down from the periodic watering will keep the earthworms moist.
Jacki installing a low-e window
 |
| |
We solved the problem of putting windows in the curved yurt walls by using a narrow window and rotating it 90 degrees. The glass in the windows, which are designed for bathrooms, is such that it passes light but you can't see through it. The half of the window that opens has a screen, so between the two windows and the door, there'll be cross ventilation.
Sarah provides a bit of scale showing the window frame
 |
| |
May 21:
Today was cool and drizzly, so instead of playing with power tools in the rain, we decided to spend the afternoon laying more tile in the kitchen. I cut tile while Sarah and Jacki laid down thin-set and placed the tiles, and in short order we had another thirty square feet of kitchen tiled.
Jacki setting tile in the kitchen
 |
| |
Given the thickness of the ring, it would be difficult to drill through from the inside and count on hitting the rafter dead center, so we came at the problem from the other side. First we marked the location of the rafter on the outside of the ring, and then set marks on the ring and rafter about two and a quarter inches up.
Using 3/8" lags to join the rafters to the ring
 |
| |
Then it was a matter of moving the rafter aside and drilling towards the center of the ring using a drill with a level built into the handle. Once that's done, you turn around and use the mark to drill a pilot hole in the rafter. At that point, it's just a matter of lining up the two holes and ratcheting the lag bolt into place.
Bolting down the outside end of the rafter
 |
| |
Once the rafter was secured to the ring, we added a second lag bolt to secure the rafter to the outter wall's header, thereby protecting the roof from any up-load that could be caused by a strong wind passing over the yurt. Also, you can note that the lag bolts were recessed so that the heads wouldn't get in the way of the roof decking.
Around evening time, the rain let up and we were able to secure a few more yurtrafters - seven done, eleven more to go.
May 22:
Sarah and Jacki working in the grout and sponging off the excess
 |
| |
Like yesterday, this was a day of intermittent showers, so we spent most of the afternoon in the kitchen alternating between gouting the tile and eating bread pudding, which is fairly typical of how we work here :-)
An interior view of the ring showing the lag bolts that secure the rafters
 |
| |
Towards evening, the rains broke enough to allow us to secure another half dozen yurt rafters. At that point, the securing of the remaining rafters was being blocked by the ring scaffolding, so we took that down before calling it a day. Even though there are a half dozen rafters yet to secure, I couldn't resist doing a couple of "chin-ups" on the brace screwed across the top of the ring, and I'm pleased to report that it was rock solid.
May 23:
Walt checks out the solidity of the roof framing
 |
| |
With the last rafter bolted into place front and back, it was time to check out the roof's solidity. I'm pleased to report that standing on top of the ring, the yurt's roof framing felt far more solid than a conventional roof. With that work completed, it's time to start decking the roof.
Notes From Windward - Index - Vol. 66
|